Part 1. Sketch3D: Getting Started
This article is the first of a three part series that introduces the setup of a sketch-based authoring application called “Sketch3D” and is part of my second series which covers topics in Augmented Reality (AR). If you’re also interested in image-based deep learning my first series “DeepNNCar: A Testbed for Autonomous Algorithms” provides a tutorial on designing, training, and deploying a self-driving algorithm on an autonomous RC car! For those curious, this series will a blend of topics involving 3D graphics rendering, computer vision, and AR development for Android.
At this point you may be wondering what sketch-based authoring is or even AR in general. Both are great questions! While the definition of AR has been the topic of debate, it generally has three requirements: reality needs to be mixed with virtual content, virtual content needs to be interactive in real-time, and finally virtual content to be registered or fixed in our mixed reality world.
One way we can interact with our mixed reality world is through authoring or the creation of content. More specifically, authoring in AR environments enables us to create virtual content dynamically and interactively. Sketch-based authoring just means we are using a 2D medium, like handmade drawings on a piece of paper, to create the virtual content and is a simple extension of how we tend to author ideas in our everyday lives.
AR authoring techniques are a hot topic in AR/VR research right now, mainly because solutions can readily be applied to various industries like manufacturing, fashion, interior design, etc. If you are interested in a general review of other areas of AR research, I highly recommend reading this comprehensive survey covering the latest trends in AR research up to 2017. Still, there are many open problems in AR that have yet to be solved. If you don’t believe me, just compare the 2017 survey to the survey published in 2008 (hint: although a lot of great progress has been made, a lot of the problems still remain).
The goal of this series is to help make AR technology available and understandable to hopefully spark interest that can help continue to push the envelope. So, without further ado, let’s get started in sketch-based authoring!
Too be frank, setting up the development environment is actually one of the bigger challenges in this project, especially if you are unfamiliar with Unity development. As a result, I decided to split this series into three parts.
What’s Covered in Part 1?
- Introduction into the Unity Editor (AR/VR Development Tool)
- Using the Vuforia AR Engine to detect Image Targets and anchor virtual content
- Setting up the application for deployment on an Android device
- Easy start-up through Github (if Unity and Vuforia are already installed)
What’s Covered in Part 2?
- Communication between a Python server and an AR Android application written in C#
- Computer vision techniques to process 2D sketches
- Dynamic rendering of 3D objects in the Unity environment
- and of course… Code!
What’s Covered in Part 3?
- The basics of Facebook’s PyTorch library, a deep learning toolbox, for training a 2D segmentation network.
- The heavy data augmentation used to create a data set suitable for performing annotation segmentation
- Training and testing of the U-Net 2D segmentation network in Google Colab environment
- Deployment and integration of the segmentation network into Sketch3D
Section 1. Introduction into the Unity Editor
The Unity editor platform is a software tool for AR/VR development and for individuals and students, it can be downloaded for free on Windows, Mac, and recently Ubuntu! At the download site, you’ll see something called Unity Hub. This is just a management tool for your projects that helps organize and launch various projects. Unity allows you to develop for a variety of platforms (Android, IOS, Windows, Hololens, etc.); however, this tutorial will focus on Android development.
Part 1. Getting started with Unity (SDK and JDK Management)
If there is one thing I have learned about Unity, it is that no matter what, there always seems to be difficulty in getting it downloaded and started. Hopefully, this tutorial will help; however, it is likely that if you are just getting started, there still be headaches along the way. My advice is to stay patient and thoroughly read each tutorial before following the steps. Unity also provides an official Android environment setup tutorial to reference along the way. Once you have Unity installed, you will need two specific things before you can actually deploy the application on an Android device. You need the appropriate Java Development Kit (JDK) and the Android SDK.
By default, Unity will download and install a JDK based on OpenJDK. However, you will need to make sure that the SDK is not only one of the most recent SDKs but that it is also compatible with your Android device. The easiest way to do this is through Android Studio.
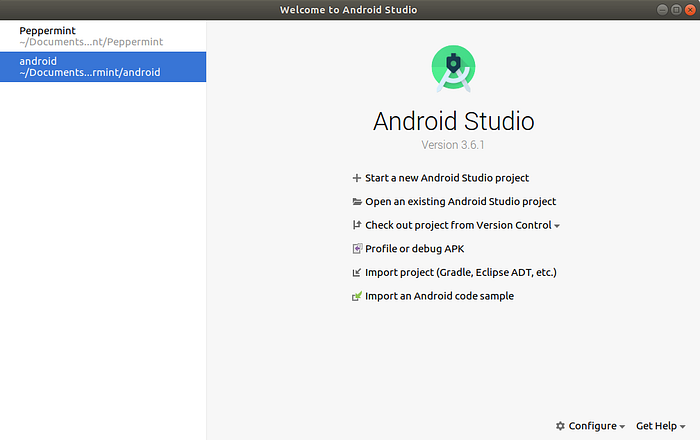
Android Studio is a development platform for Android apps and can be downloaded for free. Upon downloading and launching Android Studio, you should see a welcome screen that looks like Figure 1. Android Studio is a large application so be patient with downloading and starting speeds.
To download and install the most recent SDK, click Configure in the lower right corner and then navigate to SDK manager. In Unity 2019.2.17 I am using Android 9.0 (Pie) and developing on a Google Pixel 2. To install the SDK, you can select the check box next to the desired SDK and click OK. The download and installation will then need several minutes to complete.
Note: If you are having trouble with an older version of an SDK, you may need to issue the following command to update your SDK.
android updateWhile that is downloading, we can make sure that our Android is ready for development. To do so, you need to download the Android Debug Bridge (ADB) which allows you connect to a USB device and debug your Unity application. For example, to check if your Android is connected to your computer, you can issue the following command that lists all connected devices, including emulators.
adb devicesYou can also specifically debug a Unity application running on your Android device using USB debugging by using the following command where XXXXXXX is the ID of your connected device from the previous command. If you only have one device connected, you can omit XXXXXXX.
adb -s XXXXXXX logcat -s Unity ActivityManager PackageManager dalvikvm DEBUGFurthermore, in order to debug an Android application via USB in general and deploy your app, you must enable developer options on your Android device. To do so, you can follow the easy steps in this tutorial.
At this point, you should have successfully downloaded and installed the SDK through Android Studio and should be able to use adb in the command lines. Now, it’s time to correctly configure Unity for Android development.
Part 2. Adjusting Unity Project Settings for Android Development
You can now launch a new Unity Project by opening up the Unity Hub and creating a new project. We now have to change a few settings in the Unity project in order to allow for deployment of our application on an Android device.
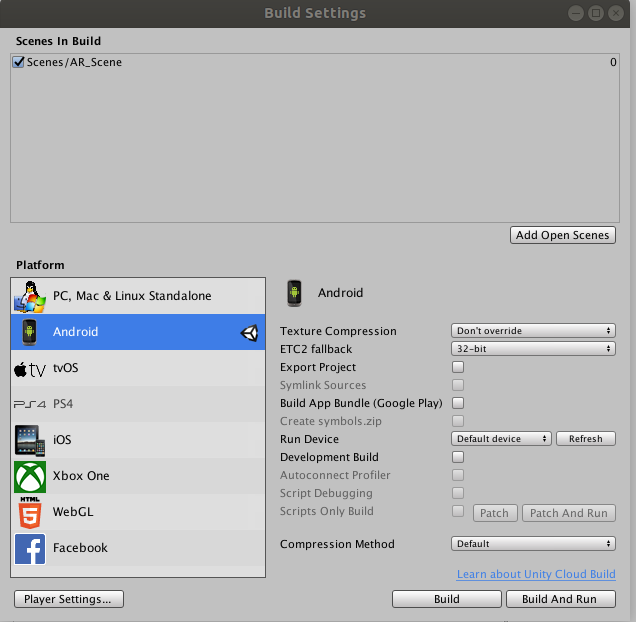
In File/Build Settings/Platform click Android and then press Switch Platform. If your device is connected, you should be able to see it in the Run Device drop down once switching the platform has completed. If not, you may need to issue the command adb kill-server & adb start-server and hit refresh next to the drop down. Also, whenever you Build and Run ensure that the correct scene has been added at the top as in Figure 2! It’s really the simple things that take the most time to debug.
Next, navigate to Edit/Preferences/External Tools and adjust the path to the Android SDK by unchecking the box next to “Android SDK Tools Installed with Unity (recommended)” and provide the path to your installed Android SDK (path may vary depending on download configuration and OS). Figure 3. shows my External Tools setting on my Ubuntu computer.

Finally, navigate to File/Player Settings/Player and adjust the “Company Name” to something like “yourname” and make the “Version” to “1.0”. Next ensure that the “Minimum API Level” and “Target API Level” in Player/Other Settings is the same as the one you installed earlier through Android Studio. Because we will be using Vuforia, ensure that both “Virtual Reality Supported” and “ARCore Supported” are not checked in the XR Settings. If after you install Vuforia, there is a checkbox to use Vuforia, check that.
That’s it for the Unity settings! Hopefully your environment is now setup and ready to go for AR development on Android!
For additional resources, Vuforia has a good tutorial to help with other issues you may encounter while getting the Unity environment setup for Android.
Section 2. Using the Vuforia AR Engine to Detect Image Targets
Unity should be ready to go now! In order to not have to re-invent the wheel, we will be using some computer vision capabilities from the Vuforia AR engine. This section details how to get started with Vuforia and how to prepare the environment to be compatible with our application Sketch3D.
Vuforia is an engine to build Augmented Reality apps for a variety of platforms and provides some pretty powerful computer vision tools out of the box and, like Unity, is free for students to use. If you are more familiar with other tools like Google’s ARCore, that could work as well. We will only be using Vuforia for creating an Image Target and so it will minimally affect the code in Part 2.
Part 1. Getting Started with Vuforia
To get started, you need to download the unity package here. Once that is downloaded, in your Unity Project, right-click on Assets under the Project Toolbar which is typically located at the bottom of the editor. Next click Import Package/Custom Package and you should be rewarded with a progress bar showing the package being added to your project.
Part 2. Becoming an AR Developer
Next, navigate to the Vuforia developer’s portal and sign up. Once you are logged in, go to License Manager/Get Development Key and confirm your license. This will be used to verify that you have the credentials to use the Vuforia API in your project.
Next, in the Vuforia development portal, go to Target Manager/Add Database and create a database for example I named mine “SketchBasedAuthoring”. A database contains a set of Image Targets. In general a target is a 2D or 3D object that the Vuforia engine can process to find features of interest and detect the object in the real world! You can use these objects to anchor virtual content in our mixed-reality world.
Part 3. Creating an Image Target
To add a new Image Target, click Add Target and then choose a folder. The target that I created using some tape and printer paper is shown in Figure 4. It is important that your target is asymmetric and contains corners so that Vuforia can find interesting features to track.
Part 4. Setting up your AR Project
Now that you are an AR developer, we can start doing some development work in our virtual environment! First, we remove the default camera which can be found in the Scene object hierarchy in the left side of the Unity Editor by right-clicking and removing it.
Next, right-click on the scene hierarchy and click Vuforia Engine/AR Camera. We need to add the license key to our application (remember the thing from the developer portal?). To do so, click on ARCamera/Open Vuforia Engine Configuration/Add License and you should be automatically directed to the Vuforia developer portal where you can copy and paste the license into the field in the Unity editor. Also ensure that Enable Video Background is checked and that Disable Vuforia Engine Play Mode is not checked.
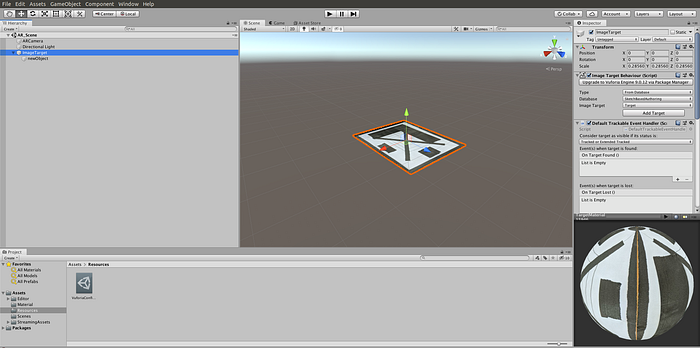
Then add the Image Target to your scene by right-clicking again and adding Vuforia Engine/Image Target. Next, click on the ImageTarget and in the Type drop down select “From Database”, then select the name of the database you created in the developer portal, and finally select the Image Target in your database that you would like to use. You should see the Image Target now appear on your screen like in Figure 5 below. Again, the purpose of this Image Target is to use it as an anchor to add virtual content to our application.
I will take a moment to note that if you want to see if your Image Target is working, you can add a 3D object and place it as a child of the Image Target in the GameObject hierarchy, deploy your application by clicking File/Build and Run/, and point the camera at the Image Target to see if the 3D object appears. If there are problems in your setup, I promise they will appear here, so it might be worth the small diversion.
To continue, what if we can’t add a pre-defined 3D object because we need the object dynamically created from a sketch 🤔? In order to do this, we need a GameObject or Unity virtual object that we can manipulate dynamically. Well, it just so happens that the GameObject we want is actually just an empty object that we add things to (who would’ve thought!)
To add this object, right click on our scene hierarchy and Create Empty object which we can add as a child of the Image Target and rename as “newObject” (see Figure 5). Next, we need to add a few things to our empty object so that it can actually render. The first is a Mesh Renderer which we can add by clicking Add Component after selecting “newObject”. In the Mesh Renderer settings, we need to add a material, which we can easily create by clicking Assets/Create/Material. Once the material is created, drag-and-drop it into the Materials of the Mesh Renderer. That’s it! At this point, everything should be set up for development of Sketch3D!
Section 4. The Code!
If you already have Vuforia and Unity set up and just want to get the code, you can always clone the repository by issuing the following command and forget about the steps previously mentioned.
git clone https://github.com/burrussmp/Augmented-Reality-Sketch-Authoring.gitThen add the cloned project in your Unity Hub. Upon launching the project, Unity should deal with appropriately compiling all of the assets and project settings. On that note, if you are having issues with the project settings, this will also be a least-effort workaround.
Section 3. Checklist and Conclusion
In Part 1 of Sketch3D, I covered how to setup Android Studio and Vuforia to allow for AR development on an Android device. In this tutorial, specifically you should have been able to successfully
- Download and install Unity and Unity Hub
- Download and install Android Studio and an updated Android SDK
- Update the Unity settings for Android and AR development
- Download and import the Vuforia AR development package
- Sign-in as a Vuforia Developer, receive a development license, and create a database with an Image Target.
- Add the necessary components to your GameObject hierarchy (AR Camera, Image Target, and Empty Object whose parent is the Image Target)
- Correctly add the license to the AR camera, the database Image Target to the Image Target GameObject, and added a renderer for the empty object
If you can check all of those boxes, you should be good to go! Above all, augmented reality is a design-oriented practice and the craft needs a lot of creative minds to really launch us into the future. The technical details of just getting Unity going shouldn’t be holding you back from that. If there are any problems or questions feel free to drop them below in the comments. Good luck!
